
The Mac operating system is a fairly robust and reliable system. Rarely have I ever had issues applying the latest security and bug fixes from Apple itself. That said, it does happen from time to time, and you have to figure out how to fix it. In this article, we’ll go over several things to try to help update your Mac to the latest version.
BEFORE YOU BEGIN:
- If you are having trouble with your system it’s important to backup your important files or folders in either a cloud service (Dropbox, iCloud, Google Drive, etc.) or onto an external drive (better yet both). You want to minimize the risk of data loss.
- You need to know what version of Mac OS you’re running. To do this, hit the Apple icon in the top left-hand corner of your screen, and in the menu hit “About this Mac”. A little window will pop up and give you some basic information about your Mac, and at the top should have the name and version number of your Mac’s OS.

- A “update” refers to the security patches and bug fixes the vendor (Apple) puts out for an existing version of the OS (for example 10.15.1 to 10.15.2), where as an “upgrade” refers to a brand new version of the system, typically with brand new features (10.15 to 10.16).
Method 1: Restart your Mac
Of course this seems like an obvious first step, but restarting a Mac can fix a number of issues. There may also be pending updates that haven’t finished yet that will finished by rebooting your machine. This can also clear out some caches that may be messing with the process.
Method 2: Do you have enough room?
When you download any update, you not only have to make room for the update to download, but also to be unpacked, room to install, and then to move stuff around. If you don’t have enough room for it, you’ll want to clean some stuff out. If you want to know what’s taking up the most space on your drive, you can check out GrandPerspective to help you figure out what’s taking up the space and what to delete if you’re unsure.
Method 3: Download the Combo Update
Apple make all its updates available on its support website. Here, you can find all the updates for all of Apple’s systems and primary apps. You can also manually search for them in the search bar. If you’re looking for the latest version of your Mac’s operating system, and type in the name of your operating system and the phrase “Combo Update”. 
What is a Combo Update? This is a package of updates that bring in all the fixes and features from the previous revisions of that system in a single download. It would be a hassle if I’m running the first revision of macOS 10.15.0 Catalina, and the latest version is 10.15.2, to have to download the 10.15.1 patch, install that, then do the same thing for 10.15.2. Instead I can download the Combo Update for 10.15.2 and get all the benefits of the .1 and .2 revisions. Admittedly in this example there’s not that many, but if you have an older version of Mac OS like OS 10.14 Mojave, where the latest version is 10.14.6.
When you find the Combo Update you want on Apple’s site, you click on it, and hit the download button. You’ll be downloading a multi-gig .DMG file, so be prepared depending on your Internet speed. Once it’s downloaded, double click on the file to open it, and run the installer package. Follow the prompts, and reboot the machine when it’s finished to complete the update. 
Method 4: Safe Mode
Try installing the update, either from the built-in update tool or from the Combo Update, from Safe Mode. Safe Mode is where the Mac turns on with only the necessary services and apps it needs to run. Apps like your anti-malware app, syncing services, etc., as well as some graphical services, won’t be running at launch. This is useful to make sure that some other service isn’t getting in the way of the update running, as well as run some repairs during boot up.

To get to Safe Mode, you’ll want to turn off your Mac. Then, while turning your machine back on, hold down on the Shift key on your keyboard until you get to the login. The startup may take longer than you’re used to, but eventually it should arrive at the login screen, with the words “Safe Boot” in red letters at the top of the screen. When you login, you may also notice the screen flash or rotate certain items on screen, as it’s using as few of its graphic services as possible to run the system. Now try again to install the update either from the Combo Update or the the built-in Mac updater. If it still won’t take the update, proceed to the next step.
Method 5: Repair macOS
If you’re still having trouble, you may have a corrupted version of macOS, and you’ll need to repair it. To start with, go to your “Applications” folder, and the open the “Utilities” folder, and look for an app called “Disk Utility”. 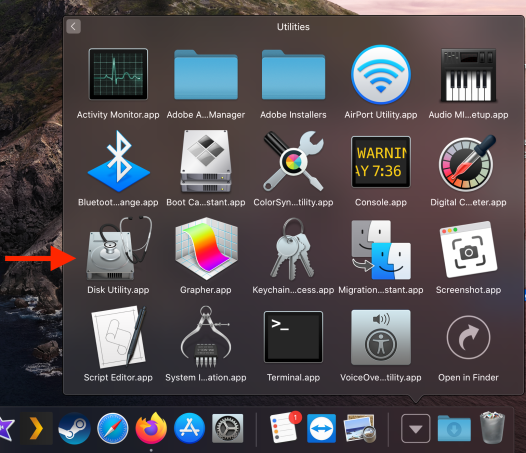
At the top of the window, hit the “First Aid” button and let it run for a few minutes. If it comes back saying there were no errors or the errors were fixed, try installing the update again. If there are errors that it can’t repair, keep reading.
Method 6: Recovery Mode
At this point, you’ll likely need to go to Recovery. Mode. If you have a Mac Recovery Flash Drive, I would recommend using this. First turn off your machine, and plug the Mac Recover Drive into a USB slot. Then turn on the Mac while holding down the “Option/Alt” key on your keyboard. You should see a list of drives pop up on screen. Select your recovery drive, which is typically orange and has the name of the flash drive, or it has the name of the OS version you’re using with its corresponding logo.
If you don’t have a Recovery Drive, then you’ll use the built-in Recovery Mode. Turn off your machine, then turn it back on while holding down the “Command” and “R” keys at the same time on your keyboard.
In both cases, you should boot to a screen asking for your language of choice, though some versions of Mac OS will take you to the macOS Utilities window.

In the window, select “Disk Utility” and run it again to see if it will repair any errors it found. Because Disk Utility is running from a different section of the drive, it has a little more freedom to try and fix errors.
Ideally it should come back having repaired any errors on the machine. If Disk Utility found errors that it couldn’t repair, proceed to the next step.
Method 7: Reinstall macOS
In the event that all of these things fail, you may have a Mac that needs its OS to be completely reinstalled. This will take about an hour to run, but this method should not delete any of your data. That said, it’s a good idea to have all of your stuff backed up before you proceed with this option. Also note that this process takes about an hour to run, so it’s best to do this when you know you won’t need the machine for a while.
While still in Recovery Mode, close out of Disk Utility, and you’ll be back on the main Recovery Mode screen. From here, hit “Reinstall macOS”, and go through the prompts to allow macOS to reinstall to the hard drive. Wait about an hour, then log into your machine again, and run the updates again.
If at this point, you somehow still can’t install the update, you will likely have to backup everything on your machine, and wipe/reload macOS from scratch. Typically most users will not reach this point unless they find larger issues with their machine.
