
iOS 14 introduced a bevy of new features in the realm of customization (among other things). One of the hallmarks of this is the ability to finally set up your own default web browser and email clients. No more having to go through any rigamarole of sharing those links to Firefox via the share sheet, no more copying to Chrome, no more clicking a mail link to have it open in the Apple Mail app only to have to move it over to your Gmail app. And no more of our Android using friends scoffing at us, or they still will since it took so long for us to get it, but we can do the same to them since Android 11 is only now getting native screen recording (actually that’s not necessary, we don’t need more conflict in the world right now). Back to the point at hand, let’s show you how to set your default browser and mail clients.
It’s important to note that 1: you must be on iOS 14 or newer and 2: app makers have to update their browser and mail clients to take advantage of the new default browser and email API’s. Some apps may not be able to made defaults at this point. That said, many app makers seem to be jumping quickly onto this feature given how long both they and we users have been clamoring for it.
Browsers
Many browsers will now prompt you after opening if you want to set them as your default browser, and this may be the easiest way to get to the setting. If not, you’ll need to launch the Settings app and scroll down towards the bottom until you get to the third party app settings, with apps listed in alphabetical order. Find your browser in the list (for example, Firefox) and click on it. Towards the bottom of the page, below the privacy permissions and above the Cross Web Tracking section, there should be an option labeled “Default Browser App”. It will show Safari unless you’ve set another browser instead. If you do not see this option available, your browser provider has not updated the app yet to take advantage of this feature or you haven’t updated to iOS 14.


Click on the “Default Browser App” setting, and you’ll be presented with a list of browser. The browser option you selected will be at the top, with any other compatible browsers listed below in alphabetical order. In this case, Firefox is at the top, with Brave, Chrome, and Safari below it. Select the browser you want so that it has the check mark next to its name. Then back out using the back button at the top left corner, and you’re done.
Email Client
Setting a default email client is very similar to setting your default browser. Just launch the Settings app and scroll down towards the bottom until you get to the third party app settings, with apps listed in alphabetical order. Find your preferred email client in the list (for example, Outlook) and click on it. Towards the bottom of the page, below the privacy permissions and above the Preferred Language section, there should be an option labeled “Default Mail App”. It will show “Mail” (referring to Apple’s Mail app) unless you’ve set another client already. If you do not see this option available, your email client developer has not updated the app yet to take advantage of this feature or you haven’t updated to iOS 14.
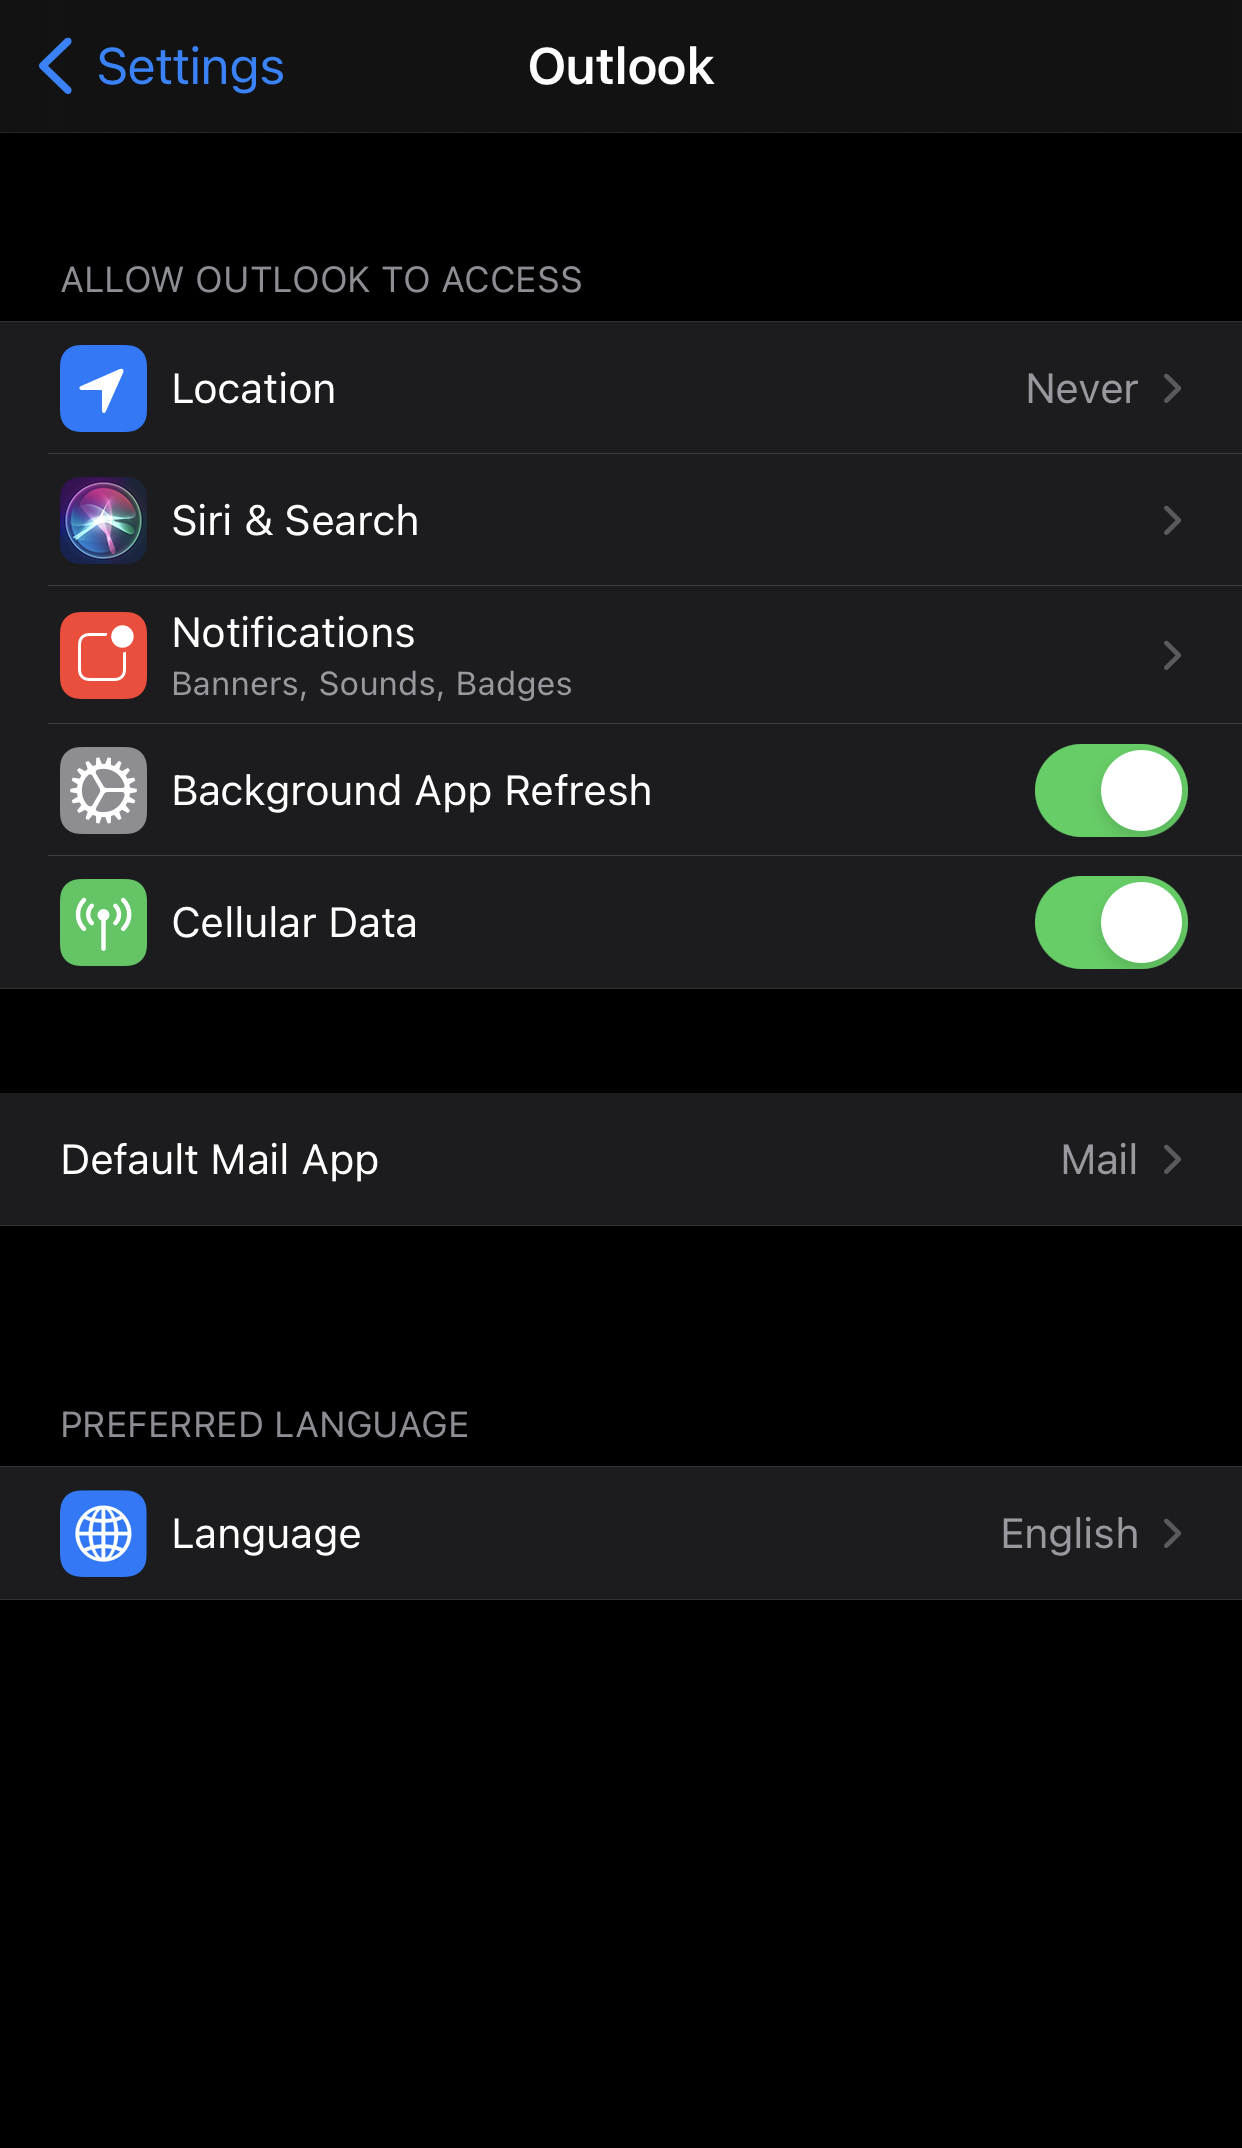

Click on the “Default Mail App” setting, and you’ll be presented with a list of clients. The client option you selected will be at the top, with any other compatible apps listed below in alphabetical order. In this case, Outlook is at the top and Apple Mail below it. Select the client you want so that it has the check mark next to its name. Then back out using the back button at the top left corner, and you’re done.
It’s a fairly simple solution over all, though perhaps in the future Apple could add this to the General section for a little faster access. If you prefer to see it in video form, check out the YouTube video before. Also tell us what you prefer as your default mail client and browser.
If you click a link and purchase something through our articles, these may be affiliate links through which we earn a commission. Commission on products do not affect editorial ability or direction, and we try to add affiliate links to items we either do or would recommend and use ourselves. We do not take money or affiliate commissions from companies in exchange for reviewing their products.
